
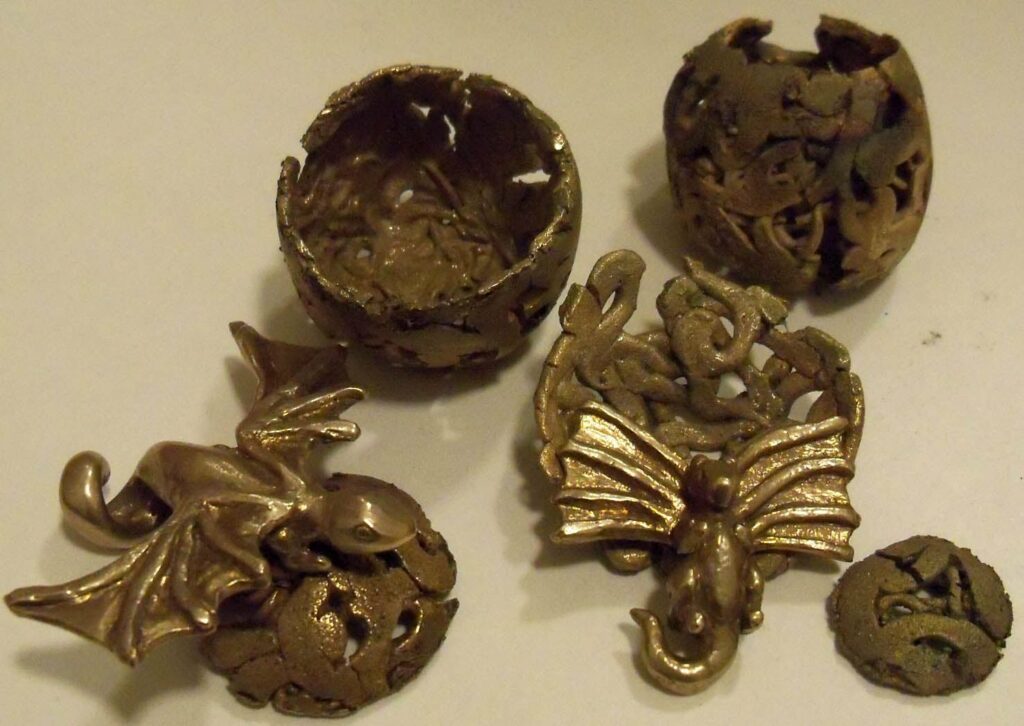
Experimenting with metal clay jewelry designs? Ever thought about trying bronze? If you haven’t already tried out bronze metal clay, this metal clay is simple to work with and will give you a professional result in no time at all. Here are the 3 Ways to Fire Bronze Metal Clay.
With some straightforward bronze clay firing instructions and a full breakdown of the tools and supplies, you’ll need soon to be able to produce unique bronze metal clay jewelry pieces that your customers will love.
How to Fire Bronze Metal Clay
1. Prepping your bronze clay for firing
Before you start the firing process, you’ll need to make sure your bronze metal clay design is arid. Your clay will be wet and more easily sculpted during the design and sculpting stage, but once you’re happy with your design, you should always leave it to dry out completely.
Can you speed this drying process up?
With smaller pieces, you may want to try drying your bronze metal clay with a hairdryer carefully. Alternatively, you could place it on top of your kiln (if you have one) or a hot plate to dry out entirely. This means that you won’t have to wait as long to fire your bronze metal clay.
You can test your metal clay to make sure that it is scorched before firing. Take a cold mirror and place your clay on it. Leave it in the mirror for just a few seconds. Is there any condensation left behind? If there is, your bronze metal clay is not completely dry yet. Leave it for a little longer and test it again to make sure it’s scorched.
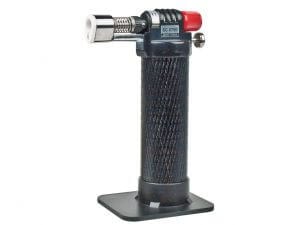
Tools for bronze clay firing:
- Hand torch or Kiln
- Bronze clay
- Soldering block
- Tweezers
- Spatula
- Stainless steel woven mesh
- Brass bristle brush
- Pickling solution
Kiln firing bronze metal clay
| Kiln Firing Method: Bronze Clay | |
| Firing time | 30 minutes |
| Temperature | 820ºC |
How to fire bronze metal clay using a kiln:
- Set your kiln to 820ºC and wait for it to reach temperature.
- Place your bronze clay jewelry piece onto your stainless steel woven mesh.
- Place the mesh onto a spatula with a wooden handle and carefully place it in the center of your kiln.
- Once the door is closed, make sure the temperature goes back up to 820ºC.
- Once the kiln reaches the right temperature again, set the timer for 30 minutes.
- Once fired, take the bronze clay jewelry piece out of the kiln and place it on a heatproof surface while it cools. A soldering block is ideal.
- Now prepare some pickling solution.
- Place your jewelry piece into the pickle and wait for the black oxides to start coming away.
- Remove from the pickle and rinse.
- Continue to remove the oxidization using a brass bristle brush.
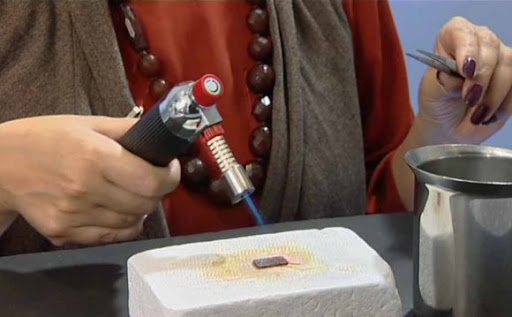
2. Torch firing bronze metal clay
| Torch Firing Method: Bronze Clay | |
| Minimum firing time (once binder has burnt off) | 7 minutes |
| Target color | Red |
Here’s how to fire bronze metal clay using a hand torch:
- Place your bronze clay jewelry design onto your stainless steel wire mesh and sit this on top of your soldering block. This will protect your work surface.
- Light your hand torch and start heating the bronze metal clay using a circular motion so that all areas of your design are being heated equally.
- Your clay will then catch fire. This is completely normal! It means that the organic binders in the clay are beginning to burn away, leaving you with the bronze metal.
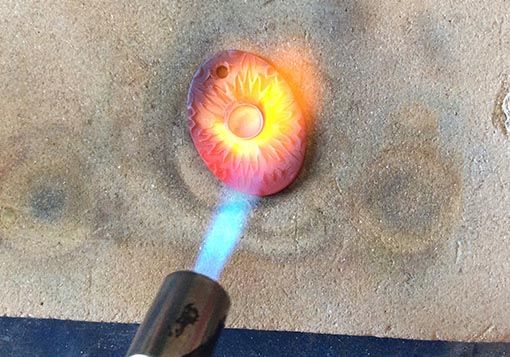
- Continue to heat the clay until the binder burns away, leaving you with a piece of bronze metal that is glowing red.
- Now start a timer. Prometheus bronze clay has a minimum firing time of 7 minutes, during which the sintering process takes place.
3. Sintering the Bronze Metal Clay
Sintering happens during the firing process. The tiny bronze particles in your metal clay get so hot that they start to make a stronger bond with each other.
Before sintering happens, the metal particles are not connected and make the metal weaker. As the sintering process continues, the metal particles merge, and the metal becomes stronger. That’s why it’s important to ensure you use the recommended time for firing your bronze metal clay, making it fully sintered and as strong as it can be.
- Continue heating the jewelry piece for the allotted time, ensuring that you keep the flame moving for a consistent firing process.
- Are your 7 minutes up? Turn off your flame and quench the bronze in some water using tweezers.
- Now, prepare some pickling solution ready to remove the oxides collected on the surface of your bronze design.
- Remove from the pickle and rinse.
- Brush your bronze metal clay design using your brass bristle brush to remove any oxides that are still clinging to your design.
5 Bronze Clay Firing Problems to Avoid
- Think about shrinkage. Remember, Prometheus bronze clay shrinks about 6-10%, so make sure the jewelry piece you’re working on has been measured to account for the shrinkage that takes place during firing.
- Proceed with caution when drying. Before the bronze clay firing process, you’ll work on the design while it’s still wet, then leave it to dry completely. With larger pieces, don’t try to speed this process up with a hairdryer, as drying it out too quickly could leave it prone to cracks and breakage.
- Firing larger pieces? Firing bronze metal clay can be done in a kiln or with a hand torch. But remember that pieces of bronze metal clay larger than a 50 pence piece are much easier to fire in a kiln. And it’s a more accurate way of ensuring that your bronze metal clay jewelry has been fully sintered too!
- Keep your eyes peel for that cherry red glow. Throughout the bronze clay firing process, watch out for the cherry red color that means sintering occurs. If the piece is glowing orange, that usually means that the bronze clay is a little too hot, so pull your flame away slightly to leave you with a glowing, cherry red color instead.
- Stick to the firing schedule. It’s important to stick to the bronze clay firing schedule of 7 minutes. If you don’t, likely, the metal will not be fully sintered, and the piece may be weakened.
With a better idea of how to fire bronze metal clay, you’ll be able to experiment further with your metal clay designs and create unique jewelry pieces for your customers. 3 Ways to Fire Bronze Metal Clay
P.S. Royi Sal Jewelry, as a decades-long leader in silver jewelry design and manufacturing, invites you to download our latest magazine here and profit from the exceptional jewelry designs at affordable prices you will find in the magazine. Click here to download it now.
Share this post


