Making hoop earrings is a great way to expand your jewelry making repertoire, even if you’re just starting in the jewelry making industry and looking to broaden your designs. Not only can you experiment with different colors, but customized shapes can also make your hoop earrings stand out from the crowd. Here are the Easy Steps in Making Hoop Earrings.
Four Easy Steps in Creating Hoop Earring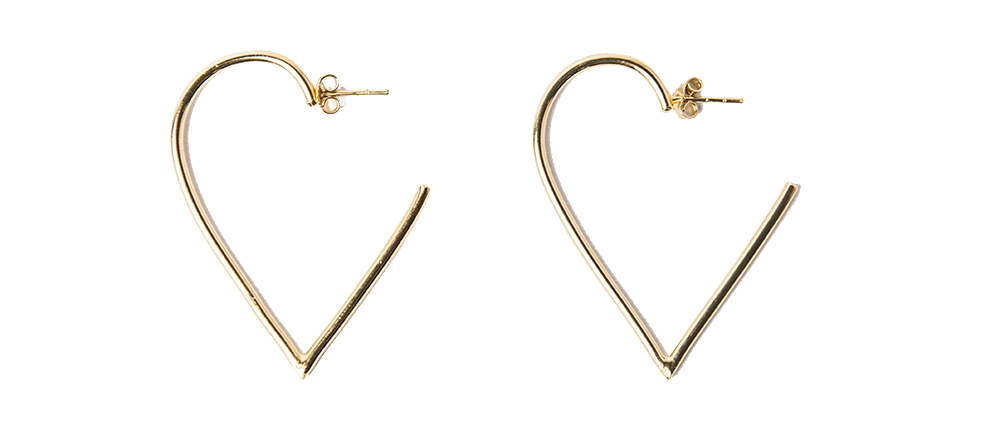
We’ll be exploring how to make hoop earrings with 20 gauge wire in silver, but there’s no reason why you can’t take your learnings and apply them to a different color or design.
Here’s what you’ll need:
- 20 gauge wire in silver
- Ring mandrel (or dowel, depending on the hoop size you want to achieve)
- Repousse (or chasing) hammer
- Flush cutters
- Round nose pliers
- Chain nose pliers
Step 1: Outline your hoop size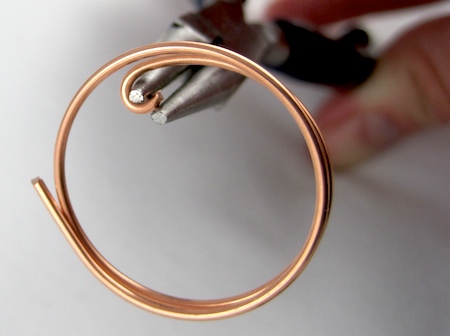
For anyone who has ever wondered how to make wire hoops, it is simple.
Start by taking your wire and wrapping it around your cylindrical tool, whether you’ve opted for a ring mandrel or dowel.
Make sure the wire is wrapped tightly to form a stable shape.
Handy tip: you don’t have to use a jewelry tool for creating your hoop shape. If you’re wondering how to make hoop earrings out of wire, and you want to develop extra-large hoops, why not choose a 2-liter bottle? Or even a soup can? As long as you can wrap the wire tightly, any cylindrical object will work.
Step 2: Cut your wire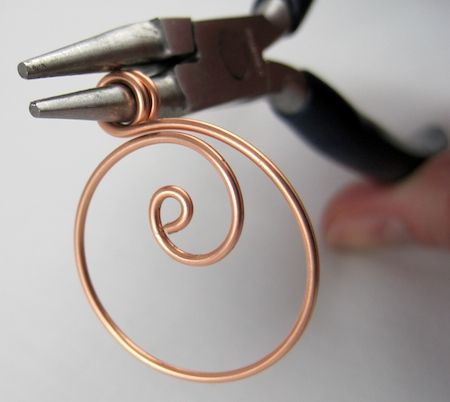
It’s essential to protect your eyes when cutting wire, as loose pieces could fly off towards you.
Once you’re happy with your hoop size, carefully remove the wire from your cylindrical object and cut the excess away using your flush cutters, making sure to leave an overlap of approximately 2cm.
You’ll need this overlap to create the fastening.
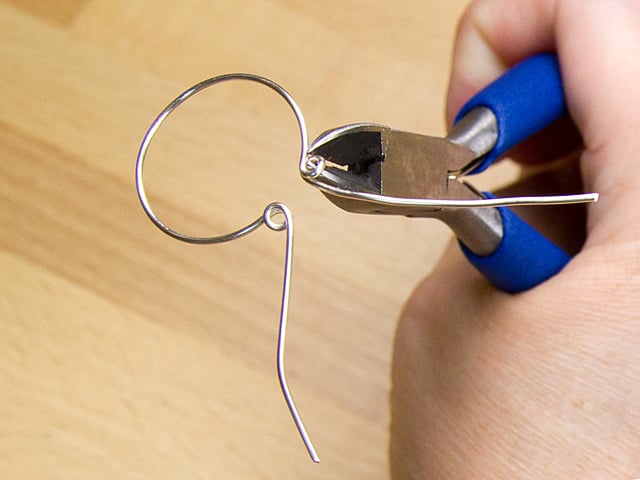
Step 3: Create your hoop fastening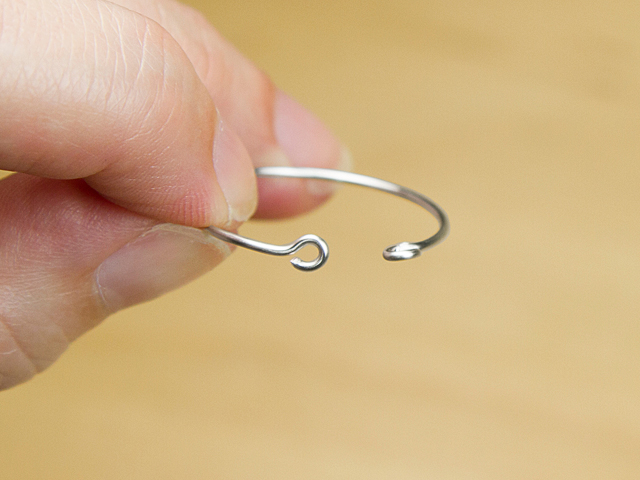
Using your round nose pliers, grip one end of the wire and carefully wrap it around the pliers, taking care not to add too much pressure to the wire.
Once you’ve formed a small loop, take your chain nose pliers and gently bend the other end of your wire into an upwards “L” shape.
It is where the wire will sit in place once fastened, so make sure that the mechanism works effectively and does not slip out of place.
Step 4: Hammer the wire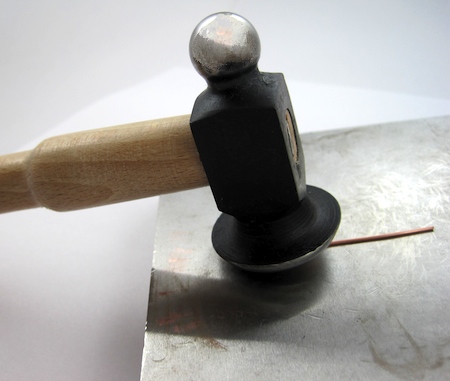
Taking your repousse hammer (or chasing hammer), gently hammer the wire to flatten it slightly.
It strengthens the shape and will give your creation a nice finishing touch.
But be careful – you don’t want to hammer into the fastening you’ve just made!
Touch-up tip: you could even use a standard nail file and buff the edges of your hoops. This works well if you’re creating hexagonal hoops with sharper edges. If you’re looking to add some different textures to your designs, our range of texture hammers will help you create the look you want to achieve.

So there you have it – how to make your own hoop earrings in just four simple steps.
Making hoop earrings is a great way to get creative with your jewelry making, especially if you experiment with hexagonal hoops, or even contrasting sizes.
What will you make next? Check out our business advice hub if you’re looking for guidance in learning and starting a jewelry business. Easy Steps in Making Hoop Earrings
P.S. Royi Sal Jewelry, as a decades-long leader in silver jewelry design and manufacturing, invites you to download our latest magazine here and profit from the exceptional or best-seller jewelry designs in affordable prices for 2019 you will find in the magazine. Click here to download it now.
Share this post


